By Katie Moser
Whether you’re at the very start of your DIY mani life (Hi! Hello! So glad you’re here!) or a seasoned at-home mani pro (Welcome Back Friend!), it’s always good to understand / revisit the basics.
We hear these common mani mistakes over and over again from our community. And hey, even sometimes we (looking at myself here) rebel against the basics. While we are all about self expression here (ie, paint whatever colors bring you JOY & the right nail shape for you is whatever you LOVE!)… If you’re after that perfect salon looking mani that lasts so long you end up taking it off NOT because you needed to, but because you tired of the color: We Got You!
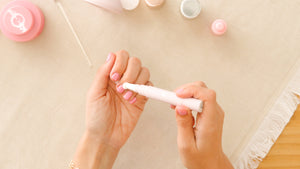
- It’s Not You, Its the Bottle - Always make sure the mouth (Lip? Opening?)… You know, that part for the open polish bottle that can accumulate literal layers of thick, semi dried goopy polish from when you’re painting and trying to get *just* the right amount of polish on the brush by wiping off the excess on the bottle? That part. Make sure it’s clean. What can happen is a mixing of new polish (from inside the bottle) with old polish (from around the opening) that can lead to a polish application that is fussy. Avoid this by keeping your polish bottles clean. Do this every once in a while and just eyeball if it needs cleaning. Saturate a paper towel with nail polish remover, and hold it around the opening for a few seconds. Then twist and wipe it clean. Bam! It’s like a new bottle. And I promise it will make your most used shades paint like new again.
- Actually Don’t Shake It Off - Shaking the polish bottle can lead to little tiny bubbles that will find their sneaky way onto your nail and you won’t even notice until it’s dry. Because: They. Are Sneaky! Instead, if you feel your polish could use a mixing or warming up… Roll it back and forth in between the palm of your hands.
- Clip, Baby Clip - When shaping, use your clippers to guide 90% of your shape. File and fine tune the last 10%. Now, if you are just doing a quick polish change, it’s ok to use just your file. But if you are making a shape change OR taking off length, the clippers are best. It’s too hard to shape with a file alone… Plus, you can get file happy and take off more than you meant to. *Insert my favorite emoji with the teeth clenched here*
- One Direction - Speaking of filing. Always file in one direction. Filing back and forth like a sawing motion can lead to: 1. Taking off more than you meant to (see Clip, baby Clip above) 2. Creating little micro tears at the edge of your nail that can lead to future breaks or polish chips.
- Buff, Don’t Cut - Repeat after me: “I Will Not Cut My Cuticles”. Cutting cuticles is a pro level skill that should be left to a manicurist. You can accidentally cut into your skin, draw blood, and/or get an infection. Instead Buff and Hydrate. Use the buffing block to gently buff away dead dry skin around your nail, as well as the stubborn bits that can grow out on the base of your nail. If your cuticles need a little extra attention, you can use the cuticle remover (from the Pedi Kit) to help soften and loosen things up. Also, True Story: the more you cut your cuticles, the more they will grow. Instead train them by buffing instead of cutting and HYDRATE like crazy. Using cuticle serum often (typically 2-3 times a day, or more as needed) will keep your cuticles soft and in control. Cuticles are the “frame” to your nails and Cuticle Serum is your BFF.
- Wash Your Hands, Just Not Right Now - We need to wash our hands often obvi, just not right before you sit down to paint. And never as part of your nail prep! Like Ever. You want your nails bone dry. Your nail plate expands when it gets wet. Painting when your nail plate is expanded means at some point (after you think you’re done with the most perfect mani) your nail plate will contract back down. This is when chipping can happen. Don’t let this most common mistake happen to you. That also means don’t paint right after you take a bath or shower (*raises hand as a former offender*). Also, if for any reason you feel you need your nail plate dehydrated a bit, the Nail Primer or Nail Strengthener (which has a primer in it) is an excellent step before you paint.
- Too Much of a Good Thing - Too much polish at once can actually be a bad thing (on your nails, not in your collection, silly). Thin, (sometimes streaky) coats are best. Painting coats that are too thick can lead to chips at best and complete polish peels at worst. Some polishes may need 3 or even 4 coats. But all of them need at least 2. How long should you wait in-between coats? Keep reading…
- Good Things Come to Those Who Wait - For the longest lasting mani, thin coats (see above) that have had time to fully dry, are best. How long should you wait between coats? We recommend 5 - 10 minutes per coat. Depending how long it takes you to actually paint all your nails, that might be 5 min right there. Or you might need to wait in between. So what happens if you don’t let it dry all the way? The first coat will try to dry while the second coat is now joining the mani party, except they are at different stages of drying and trying to mix together and what you’re gonna get is little bubbles.
- Late Night Painter - Sometimes we paint at night because that’s the only time we have to ourselves! And That’s Okay.. and good for you making time wherever you find it! Painting at night can have you waking up with sheet marks in your mani. If this is you (this is MANY of us - *raises hand again*) take the lead from SGT and skip the top coat until the morning. It can hide and quite literally gloss over any minor dents.
- Top Coat Every 2 - 3 Days - It’s as simple as that! Top Coating every few days will keep your mani looking Shiny New! It will also help guard against any chips and becomes more gel-like with each coat.
Look at you, you At-Home Mani Pro! You now have the insider's guide to living your best mani life!